How to Make a Father’s Day Card Step by Step at Home
Learn how to make a Father's Day card step by step at home with easy DIY techniques, creative ideas, and heartfelt personal touches Dad will treasure.
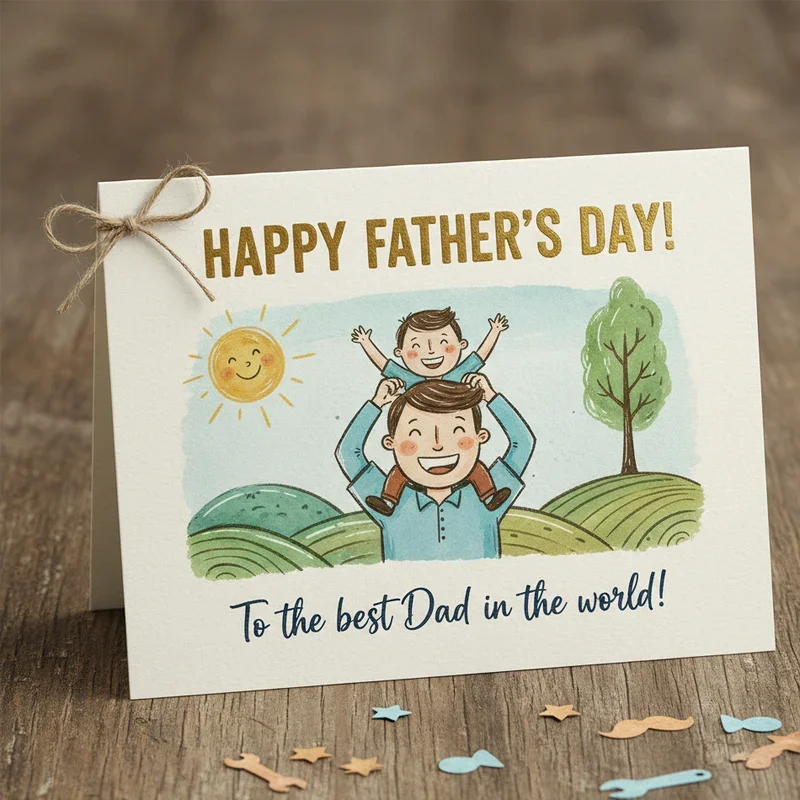
Well, here's the thing about dads: they might say they don't need anything special for Father's Day, but boy, do their eyes light up when you hand them something you've made with your own two hands! Making a homemade card isn't just about saving a few bucks (though your wallet will thank you). It's about creating something that screams "I love you, Dad" louder than any store-bought card ever could.
You know what? Getting started on this creative journey doesn't require you to be the next Picasso. Whether you're all thumbs with crafts or you've got some artistic flair hiding up your sleeve, this guide will walk you through how to make a Father's Day card step by step at home. Trust me, by the time you're done reading this, you'll be itching to grab those scissors and get crafting!
Why Homemade Cards Hit Different
Let's face it, walking into a card store can be overwhelming. Row after row of generic messages that don't quite capture what YOUR dad means to you. Plus, have you seen the prices lately? Yikes! When you make a card at home, you're basically bottling up all those inside jokes, shared memories, and special moments into one perfect package.
Here's what makes homemade cards absolutely unbeatable:
They're one-of-a-kind treasures (no two are alike!)
You can personalize every single detail
Kids can jump in and help too
Budget-friendly without looking cheap
They become keepsakes dads actually keep
Gathering Your Supplies: The Fun Treasure Hunt
Alright, before diving into the creative process, let's talk supplies. Here's the beautiful part: you probably have most of this stuff lying around already! Rummaging through your craft drawer or junk drawer (we all have one) is half the fun.
Essential Supplies You'll Need:
Card stock or construction paper (the foundation of your masterpiece)
Regular printer paper (for practice runs and extra decorations)
Scissors (sharp ones make life easier)
Glue stick or white glue (no mess, no stress)
Markers, crayons, or colored pencils (whatever tickles your fancy)
Ruler (for those who like straight lines)
Pencil (mistakes happen, and that's okay!)
Optional But Awesome Extras:
Stickers (because who doesn't love stickers?)
Ribbon or yarn
Old magazines for collaging
Glitter (if you're brave enough)
Buttons or small decorative items
Family photos
Washi tape
Stamps and ink pads
How to Make a Father's Day Card Step by Step at Home: The Basic Foundation
Now we're cooking with gas! Let's start with the basic card structure. This is your canvas, your blank slate, your opportunity to create something amazing.
Step 1: Choose Your Card Style
First things first, you've gotta decide what type of card you're making. Will it be a traditional folded card? A pop-up surprise? Maybe a accordion-style card that unfolds to reveal multiple messages? The world's your oyster!
For beginners, I'd suggest starting with a classic folded card. Take your cardstock and fold it in half hamburger-style (that's the short way) or hot dog-style (the long way). Press down firmly along the crease using a ruler or the edge of a book. Voilà! You've got your basic card.
Step 2: Planning Your Design
Hold your horses before you start gluing everything down! Sketching out your ideas first saves you from those "Oh no, what have I done?" moments. Grab that pencil and lightly sketch where you want everything to go. Think about:
Where will your main message go?
What images or decorations will you include?
How much white space do you need?
Will you add anything to the inside?
Creative Design Ideas That'll Knock Dad's Socks Off
Ready to take things up a notch? Here's where the magic happens, folks!
The Classic "Best Dad" Trophy Card
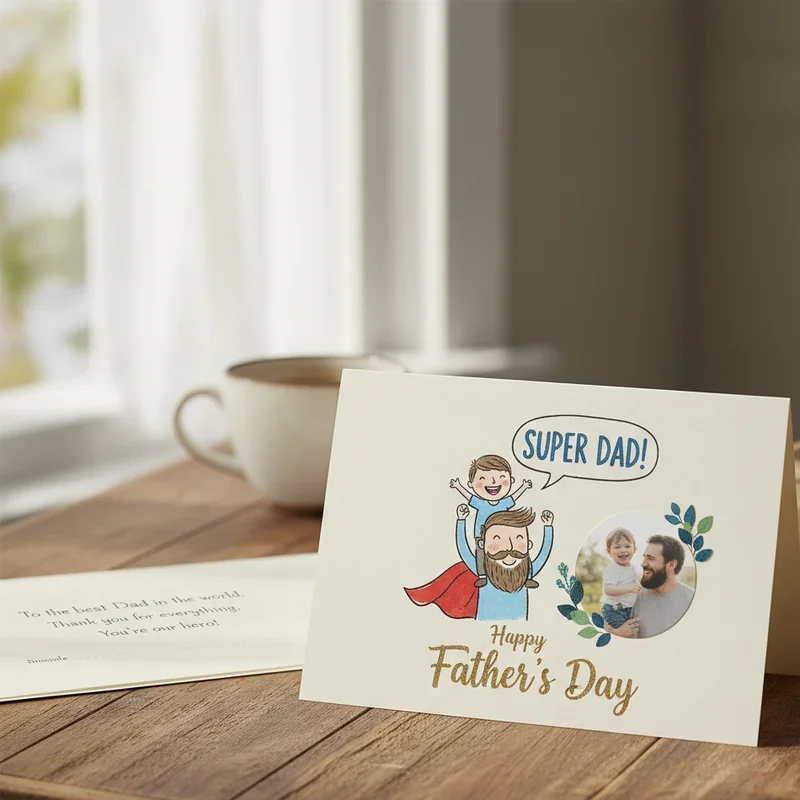
Who says trophies have to be made of metal? Create a trophy-shaped card by cutting out a cup shape from gold or yellow paper. Add handles on the sides, write "#1 Dad" in the middle, and boom! You've got yourself a winner. Glue it to the front of your folded card, and watch Dad's chest puff up with pride.
The Shirt and Tie Combo
This one's a real crowd-pleaser! Cut out a shirt shape from colored paper, then create a little paper tie. You can even make the tie from patterned paper or draw Dad's favorite sports team logo on it. Folding the collar gives it that 3D effect that really pops!
The Tool-Themed Masterpiece
If Dad's the handy type, why not create a card covered in paper tools? Cut out hammers, wrenches, and screwdrivers from different colored papers. Arrange them around a message like "Dad, you're the tool that holds our family together!" Cheesy? Maybe. Adorable? Absolutely!
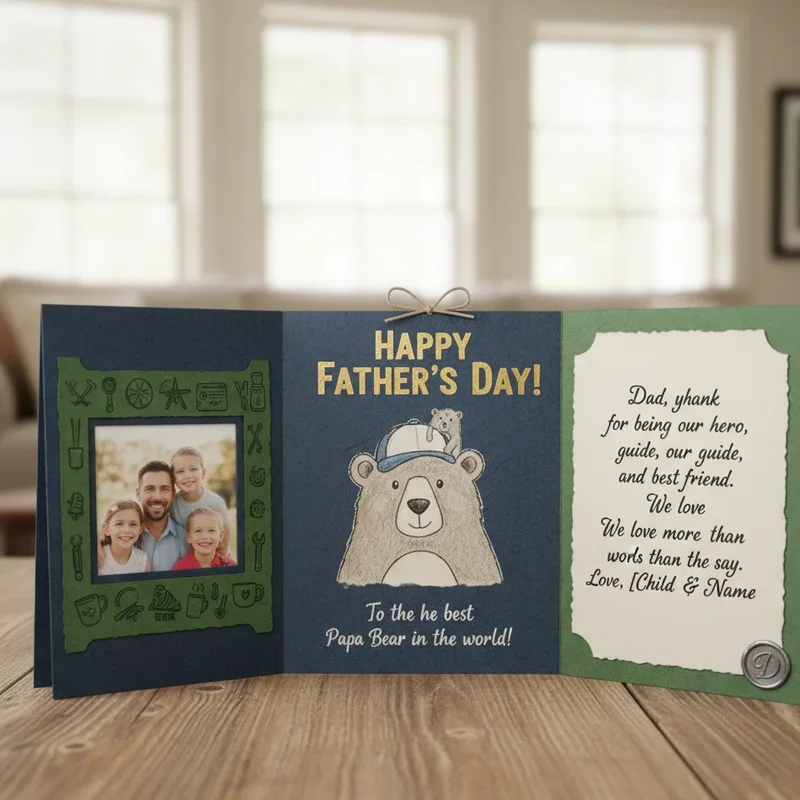
Photo Collage Memory Lane
Nothing tugs at the heartstrings quite like a trip down memory lane. Print out small photos of you and Dad throughout the years. Arrange them in a heart shape or spell out "DAD" on the card front. It's personal, meaningful, and guaranteed to get at least one "aww" moment.
Adding Personal Touches: The Secret Sauce
Here's where things get really special. Personal touches transform a nice card into an unforgettable keepsake.
Handprints and Fingerprints
Little kids' handprints never go out of style! Dip those tiny hands in washable paint and press them onto the card. Turn fingerprints into little bugs, balloons, or even a fingerprint tree. Dad'll remember exactly how small those hands were years from now.
Inside Jokes and Memories
Remember that time Dad tried to cook dinner and set off every smoke alarm in the house? Or his legendary dad jokes that make everyone groan? Include these memories! Write "Thanks for all the 'well-done' dinners" with a little drawing of a smoke cloud. These personal references show you're paying attention and cherishing those moments.
Kids' Artwork Integration
If you've got little ones helping, let their creativity shine! Maybe they draw Dad as a superhero (cape and all), or perhaps they create abstract art that only they can explain. Whatever it is, incorporate it into the card design. Their unique perspective adds charm you simply can't replicate.
Step-by-Step Assembly Process: Putting It All Together
Alright, you've got your ideas, your supplies are ready, and you're pumped to create. Let's walk through the actual assembly process.
Step 1: Create Your Background
Start with your folded cardstock base. If you want a colored background, now's the time to add it. You might:
Color the entire front with markers
Glue on decorative paper
Create a pattern with stamps
Add a watercolor wash (just make sure it dries completely!)
Step 2: Add Your Main Elements
Working from back to front prevents covering up important details. If you're doing a layered design, start with the biggest elements first. Use your glue stick sparingly; a little goes a long way, and too much can make your paper wrinkle.
Step 3: Layer in Details
Now for the fun details! Add your smaller decorative elements, making sure everything's balanced. Don't overcrowd; sometimes less is more. Leave some breathing room around your text so Dad can actually read your heartfelt message!
Step 4: Write Your Message
Whether you're going funny or sentimental, make it count. If you're nervous about messing up, write your message on a separate piece of paper first, then glue it in. Pro tip: use guidelines drawn lightly in pencil to keep your writing straight, then erase them once the ink dries.
Step 5: Finishing Touches
Add any final embellishments like glitter accents, ribbon borders, or stickers. Check for any loose edges that need extra glue. Let everything dry completely before handling.
Message Ideas: Words from the Heart
Stuck on what to write? Writer's block hits the best of us! Here are some jumping-off points:
For the Sentimental Route:
"Dad, you've been my hero since day one"
"Thanks for showing me what strength and kindness look like"
"Every life lesson you taught me shaped who I am today"
For the Humor Lovers:
"Thanks for the dad jokes. I'm still recovering"
"World's Okayest Dad (Just kidding, you're the best!)"
"Dad: CEO of Bad Dancing and Great Hugs"
For the Simple and Sweet:
"Love you to the moon and back, Dad"
"Grateful for you every single day"
"My first friend, my forever hero"
Troubleshooting Common Card-Making Hiccups
Even the best-laid plans can go sideways. Here's how to fix common mishaps:
Glue mishaps? If you've got glue showing where it shouldn't, try covering it with a strategic sticker or small decoration. Nobody'll know!
Crooked cuts? Embrace the "rustic charm" or trim the edges with decorative scissors for an intentional looking wavy edge.
Smudged writing? Turn that smudge into a decoration! Add a small drawing or sticker over it.
Card won't stand up? Reinforce the spine with an extra strip of cardstock glued inside.
Making It a Family Affair
Want to really amplify the awesome? Get the whole family involved! Set up a card-making station at the kitchen table. Put on Dad's favorite tunes (just not while he's home, obviously). Everyone can make their own card or contribute to one mega-card. Younger kids can handle the gluing, older ones can do the cutting, and everyone can add their personal messages.
Creating together means more laughs, more memories, and honestly? The slight chaos adds to the charm. Those imperfect edges and crooked letters? They're not mistakes; they're character!
Advanced Techniques for the Overachievers
Feeling ambitious? Let's kick things up another notch!
Pop-Up Elements
Cut two parallel slits in the fold of your card, push the tab forward, and glue decorations to it. When Dad opens the card, surprise! Something pops up to greet him.
Watercolor Backgrounds
Use watercolor paints to create a soft, artistic background. Let colors blend and bleed into each other. Just remember to let it dry completely before adding other elements.
Quilling Details
Roll thin strips of paper into coils and shapes to create 3D decorative elements. It's time-consuming but absolutely stunning.

Preserving Your Masterpiece
You've poured your heart into this card, so let's make sure it lasts! Consider:
Spraying it with a fixative to prevent smudging
Storing it in a protective sleeve until Father's Day
Taking a photo of it (just in case)
Making a duplicate if you're giving it to young kids to handle
Conclusion
There you have it, folks! You've just learned how to make a Father's Day card step by step at home that'll absolutely blow Dad's mind. Remember, perfection isn't the goal here; love is. Every crooked line, every fingerprint smudge, and every glitter explosion tells Dad that you cared enough to create something just for him. So grab those supplies, channel your inner artist, and create something that'll earn a permanent spot on Dad's office wall. Happy crafting, and here's to all the amazing dads out there!
Read next: 15 Thanksgiving Decoration Ideas for a Stylish Holiday Home
Frequently Asked Questions
Q1: What if I'm terrible at drawing?
A: Use stickers, magazine cutouts, or printed images instead of drawing!
Q2: Can I make cards digitally and print them?
A: Absolutely! Design digitally, print, then add handwritten messages for personal touch.
Q3: How far in advance should I start?
A: Give yourself at least two days for drying and fixes.
Q4: What if my kids are too young to help?
A: Even babies can contribute with footprints or handprints using washable paint!
Q5: Can I use recycled materials?
A: Yes! Old greeting cards, newspapers, and magazines work perfectly for collages.
Stay up to date with our latest ideas!